Beginning The Queen’s Garden BOM

Remember my post when I listed out my goals and projects for 2018? Did I say a single thing about starting another quilt? Did I say that I have too little to do and need more UFOs in my life??

Yeah, no. But sometimes, when you fall in love, you just gotta do it, you know?

So I’ve begun Esther Aliu’s The Queen’s Garden block-of-the-month applique quilt. And it’s a joy to be working with such a gorgeous array of colors and fabrics!all gathered up

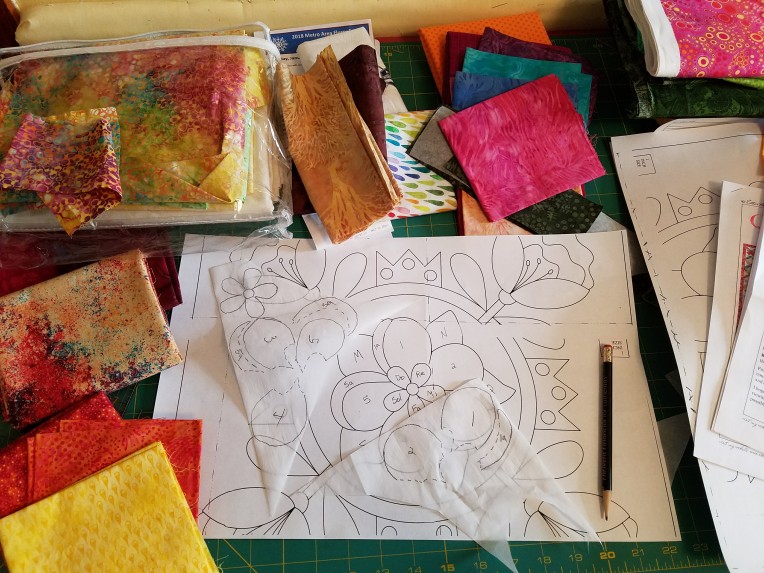
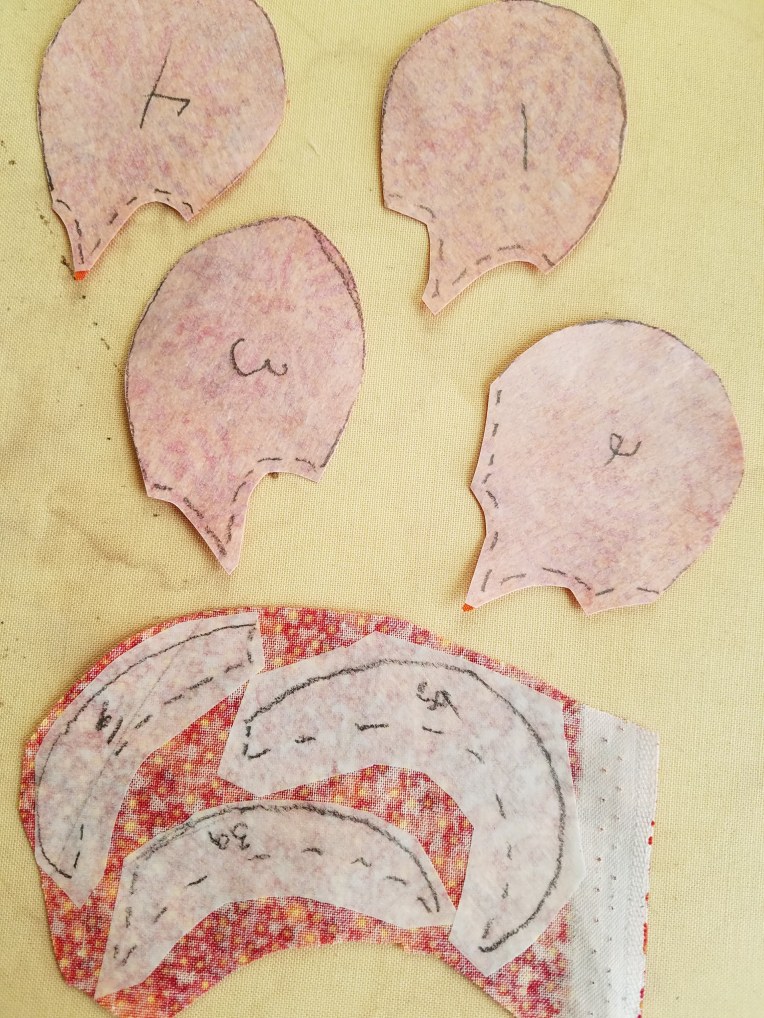
Some of the fabrics are a bit buried, but you’ll see more of them as I use them. The pattern piece here is the center applique block that will finish at 16″. I’ve numbered each of the pieces, and have some of the shapes traced onto Wonder Under (and also numbered).

Then I ironed some Wonder Under pieces onto one of the few pieces of calico I’m using–most of my fabric is going to be batiks.

mistake

See the problem??? sigh I can’t use a piece with the adhesive ironed onto the front, instead of the back, of the piece!! It doesn’t matter how often I do this kind of work, I still make this mistake at least once on pretty much every project I do!

some pieces cut out

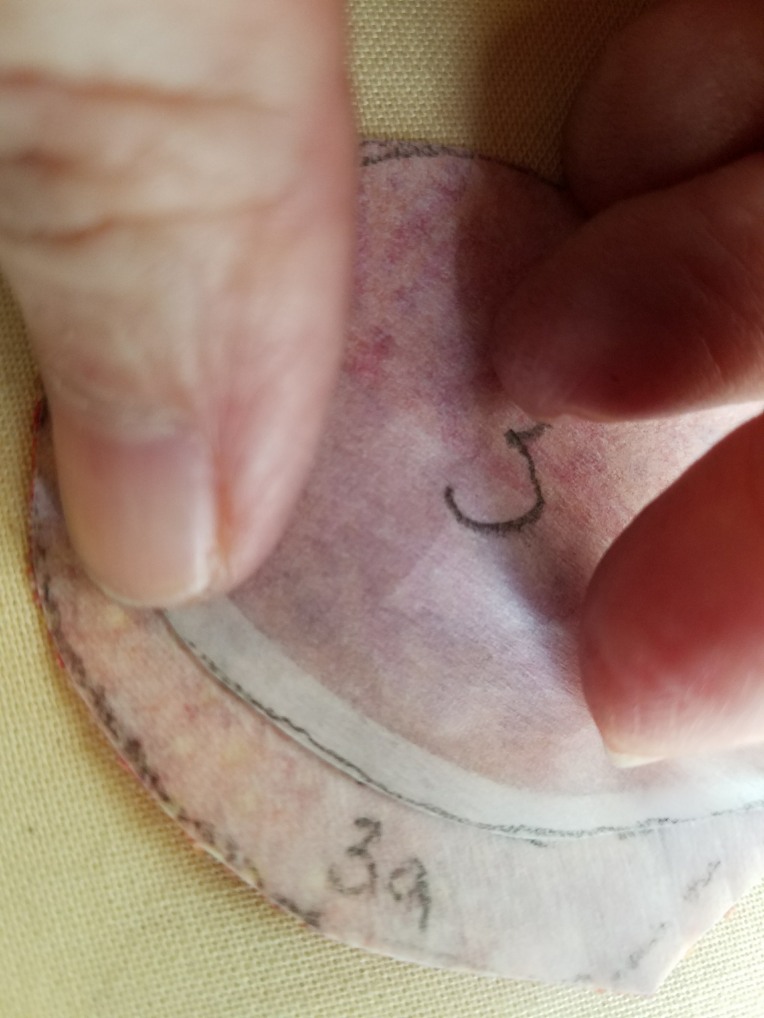
Okay, now it’s fixed!

sticking down a sliver 2

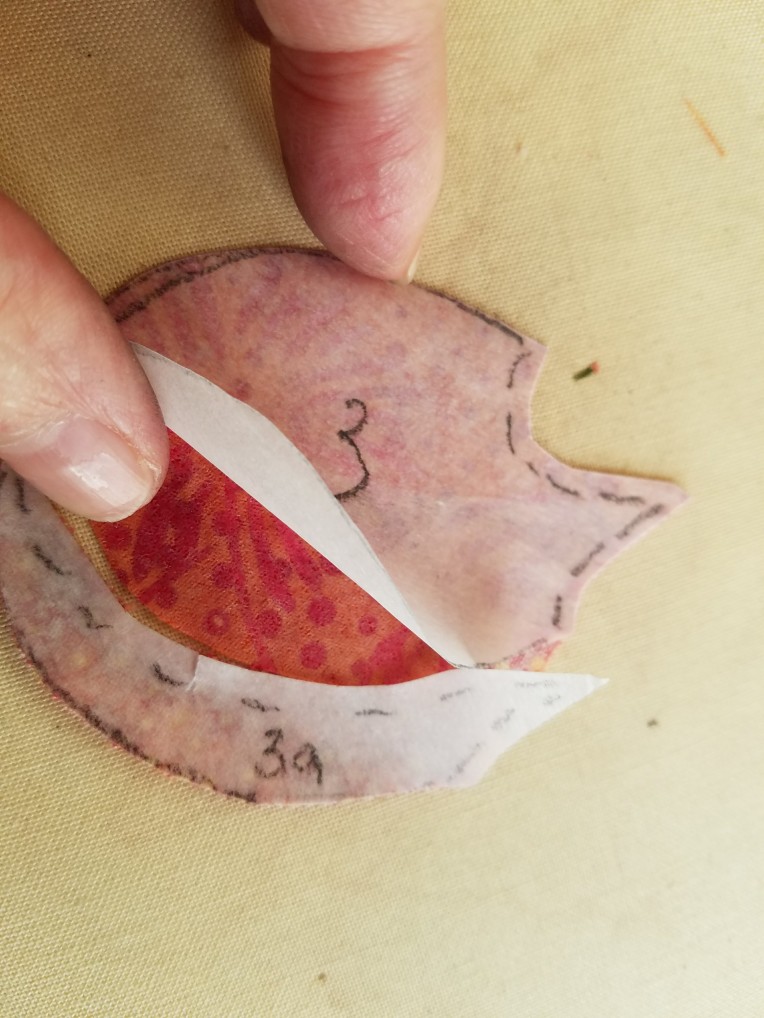
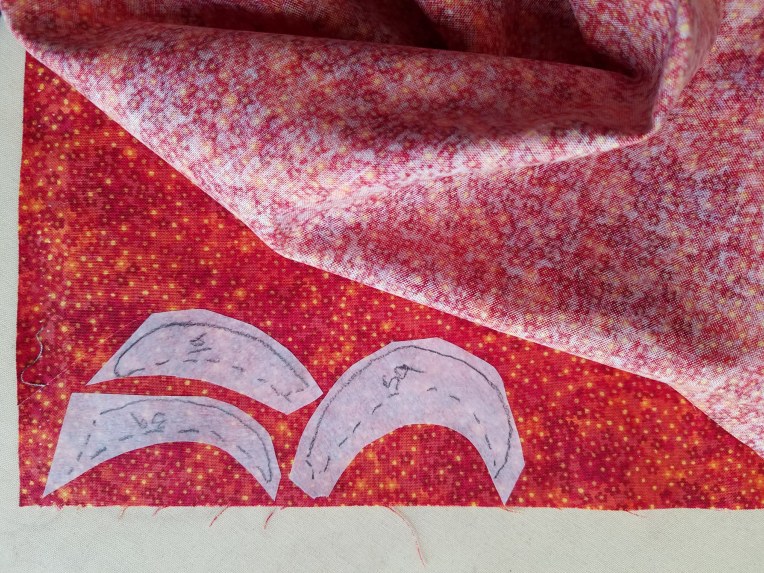
See the dotted line on the skinny piece labeled 3a? That’s the part that belongs under the petal next to it. So, to help keep everything placed accurately, I peeled up the backing of the large piece, then slid the entire skinny piece between the fabric and the paper backing. It took some shifting, but I got it all lined up so that the edge of the large piece followed exactly along the dotted line of the skinny piece: then I pressed it and the two were one piece.

sticking down a sliver

Here it is, all put together.

ready to embroider

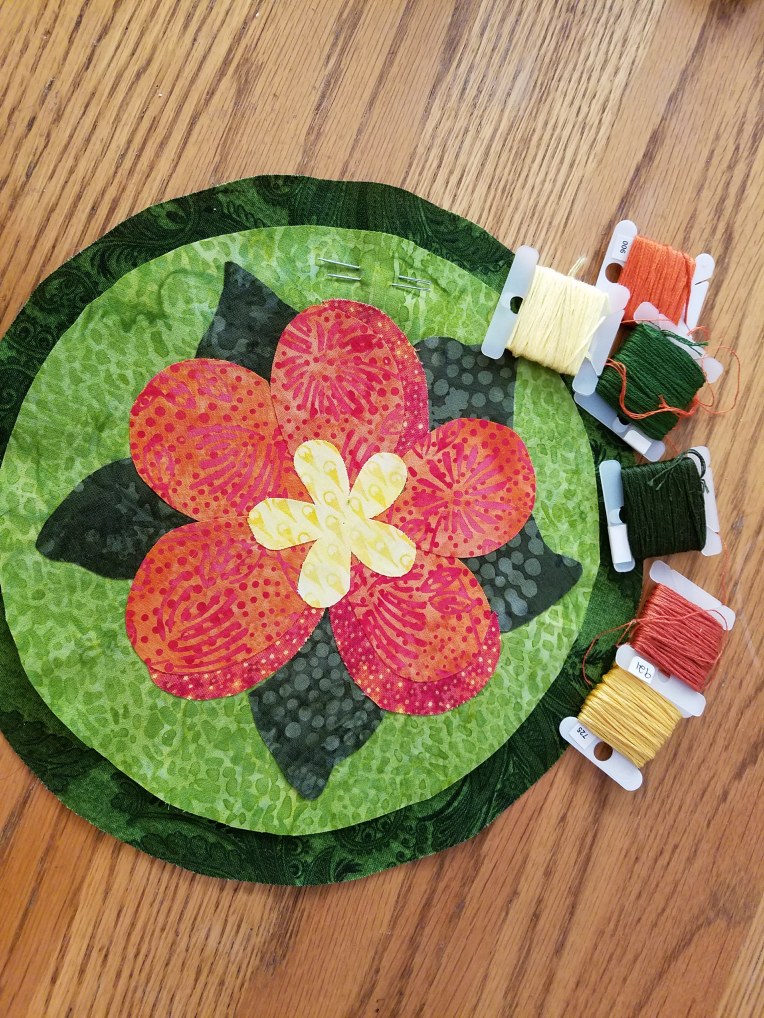
And here are the DMC colors I’m going to use to stitch down the various pieces. I love handwork, and especially handwork that can be easily transported, which makes this a perfect project for a life-on-the-go.

embroidery begun

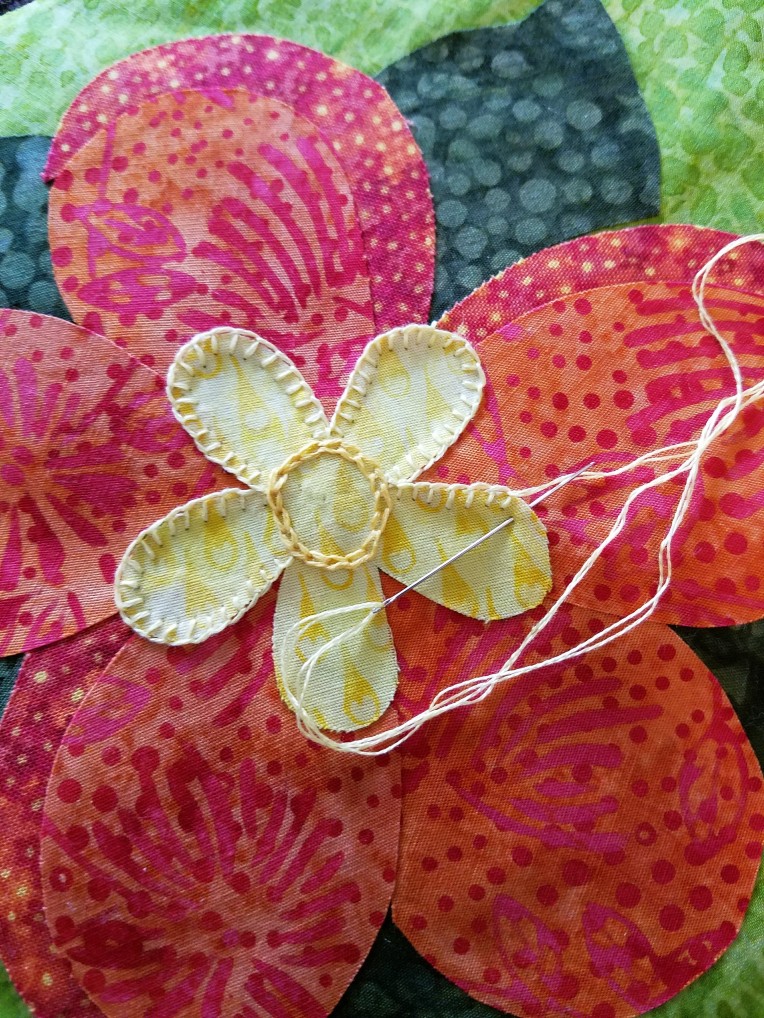
I did a lazy-daisy chain around the center, and am doing the blanket stitch around the edge of the yellow daisy. Haven’t decided what stitch(es) I’ll do on the next pieces, but I’m sure having fun holding these colors in my hands on these gloomy winter days!


Christmas Carol Joy

For all that I sew, and all that I quilt, I’ve only ever made one quilt sized for a bed. So when I finished the “Simple Summer Sampler” mystery quilt along in November, it was a real moment of celebration! The way a mystery quilt along works is that you have no idea what it’s going to look like when it’s done; you only know how much fabric to have on hand, what kinds of colors to use (I chose red and white) and when the next instructions will arrive. Well, the first two blocks came on the first Thursday in July–just three days before we left for our trip to Germany. The next two blocks came on the second Thursday in July–when we were in Germany. The next two blocks came the next Thursday–the day after we got home from Germany.

So, yeah, I was behind from the get-go.

The thing is, some of those blocks were very fast to make, and while others were a bit more time-consuming, none of them took more than an hour. Thus, it wasn’t that tough to catch up. When we started getting four blocks each week in September, it was a bigger challenge, but by then, I was excited to think I could have this done by Christmas, so I pushed hard to stay caught up.

Finally, on November 2, the instructions came for finishing it: the details for what size to cut the setting triangles, the sashing, and all the other pieces. And, although I felt as if all I did was sew, it was Thanksgiving before I finally got it all assembled.  I had asked my friend Sarah Lynn Jackson if she would quilt my quilt (such a silly phrase, eh?) and she said yes! Her work is gorgeous, and I’m thrilled with the custom design she did for me. But, since I was so late getting it to her, all of her own Christmas activities had to take precedence, and it was January before she was able to finish it. Then began the work of sewing on the binding, and then stitching it down by hand.

sewing the binding on the Christmas quilt

This quilt is 96×104, or thereabouts, which means it’s approximately 400″ all around it. That’s a very long distance to stitch by hand, which is what I prefer most of the time. So I stitched, and stitched, and stitched. 20180116_204059

My husband and I are savoring the final episodes of Longmire; I also watched The Crown, and lots and lots of HGTV. I discovered that old game shows were the easiest to stitch to, however, because I could mostly listen, and not feel I needed to look up to see what was going on. Finally, finally…20180120_102212

I finished it! Oh, such a relief! Since I was taking a stitch in each red spot between the gold stripes, and there are five in each inch, that was TWO THOUSAND stitches it took, give or take, to stitch down that binding. A fun task, but l.o.n.g.

I also had the label completed and stitched in:20180120_103222

So here’s the quilt when it was still a flimsy–just the top, and not quilted:20171128_194919

And here it is on the bed that belonged to my husband’s great-grandparents in the 1800s:15863

It’s a bit awkward because it’s draped over the wooden footboard–but it’s done!

And now it has occurred to me that I have three kids but only one Christmas quilt. Hmm…  I already have a “Christmas Carol Joy,” named in honor of all those carols I love to sing at Christmas. I think a “Christmas Candle Peace” and “Christmas Star Hope” are in my future.

But first, it’s back to that project list! I think the Missy quilt is going to get my attention now!

January Snowman, a Third Time!

snowman quilt

And our own snowman is finally finished! As I explained in my post last month, I first saw this adorable quilt several years ago in Keepsake Quilting magazine, and instantly fell in love–except that I wanted it in blues for January. I could have bought the pattern, but I buy so many patterns and then never make them that I’m rather gun-shy about buying new patterns. And when I was finally ready to start last November? The pattern was no longer available.

So I made it my own!

It’s very similar to the two I made for our family gift-exchange except that ours is a bit larger (I had visions of cuddling up with my husband as we watched the final season of Longmire on Netflix), ours is backed with fleece and has no batting, and ours has a hat.

close up of snowman

Oh, and the fabric for the scarf is the batik I’m using for a hexie table runner; it should be done sometime by April or May and I’ll post pictures then!

close up of satin stitch and buttonhole stitch

I chose to do a hand-stitched buttonhole stitch with two strands of floss all around the snowman, but I did a machine satin stitch for almost everything else.

close up of nose

Everything, that is, except the carrot nose; it just begged for more hand-stitched buttonhole stitching, in tiny little stitches.

close up of hat

My son Paul designed the hat for me; isn’t it cute?

close up of whipstitched corner

And when I was trimming the seam allowance for the binding, because it was just a bit too wide for the binding to cover, I accidentally cut the corner–OOPS! It was just a sliver that got cut off, however, and once I whipstitched it back together, and then folded over the binding, it’s virtually invisible…whew!

So what’s next? It’s the Christmas quilt! I’m almost done sewing on the binding; next will come hours and hours of folding it over and stitching it down by hand: Netflix, here I come!

sewing the binding on the Christmas quilt